Designing a printable can be both a fun and rewarding creative journey, especially with tools like Canva at your disposal. Canva, a game-changer in the world of graphic design, is known for its user-friendly interface and myriad of features. It’s perfect for anyone looking to craft professional-grade designs without the steep learning curve. In this guide, let's dive into how you can use Canva to create stunning printables, whether you're a seasoned designer or a newbie.

1. Starting Your Printable Design Process
First things first, head over to Canva's website and log in. You can use your email, Google, or Facebook account to access a world of creative possibilities. Once logged in, you’ll find yourself in a space designed for both beginners and seasoned designers. Canva's interface is intuitive, making it easy to navigate through its features and tools. Get ready to explore an impressive range of design tools.
You have access to a whole lot of fonts, images, illustrations, and much more. Check out Canva's Design School- super easy tutorials.

2. Choose Your Design Type
If you already know what you want to create and have the idea ready then hit the ‘Create a design' button at the top right. This is where you decide what size the printable will be – be it a checklist, planner, or worksheet. Canva also allows custom dimensions, giving you full control over your design’s size.
If you don't know what to design I created this list for you and all you need to do is put in the Canva search area the title of the printable you want to create. Canva will give you templates that meet the search requirements. USE TEMPLATES- it will save you time and mind power. If you are selling the printable then start with a blank template. But for this post, I'm talking about personal or use in your business (freebies) printables. So take out the overthinking and keep designing a printable into an hour project and not a whole day project.

Here are 30 Ideas- One Page Printables
- Daily Planner: Design a simple daily schedule with sections for appointments, to-dos, and notes.
- Meal Planner: Create a weekly meal planner with spaces for breakfast, lunch, dinner, and snacks.
- Grocery List: Make a categorized grocery list to organize shopping trips better.
- Budget Tracker: Craft a monthly budget tracker with income, expenses, and savings sections.
- Exercise Log: Design a workout log with spaces for exercise type, duration, and intensity.
- Reading List: Create a printable for book enthusiasts to track their reading list and reviews.
- Recipe Card: Design beautifully organized recipe cards for your favorite dishes.
- To-Do List: A simple, checkbox-style to-do list for daily tasks.
- Cleaning Checklist: Develop a cleaning schedule and checklist for different areas of the house.
- Habit Tracker: A tracker for monitoring daily habits and routines.
- Goal Planner: Set and track personal or professional goals with a dedicated goal planner.
- Birthday Reminder Chart: Never forget a birthday with a simple birthday calendar.
- Travel Itinerary: Design a travel itinerary planner for your next trip.
- Event Planner: Create a one-page event planner for parties, meetings, or gatherings.
- Kids Chore Chart: A fun and colorful chore chart for kids.
- Motivational Quote Poster: Design a poster with your favorite motivational quote.
- Weekly Reflection Journal: A space for weekly reflections, gratitudes, and achievements.
- Monthly Calendar: Simple, customizable monthly calendars.
- Project Timeline: A timeline template for project management.
- Mind Map Template: For brainstorming sessions and idea generation.
- Class Schedule: A printable class schedule for students.
- Emergency Contacts List: A list of emergency contacts and important addresses.
- Pet Care Schedule: A pet care chart with feeding, walking, and medication times.
- Vehicle Maintenance Log: Keep track of car maintenance schedules and expenses.
- Packing Checklist: A checklist for travel packing.
- Baby Feeding/Sleep Log: A log for new parents to track feeding and sleep times.
- Gift Planner: Plan gifts for holidays and special occasions.
- Invoice Template: For freelancers and small business owners.
- Workshop or Webinar Notes Template: A structured template for taking notes during workshops or webinars.
- Water Intake Tracker: A daily water intake chart to ensure hydration.
3. Template Time
Now, explore the all of templates Canva offers. Whether you're looking for something minimalistic, playful, or professional, there's a template for every need. Found the one? Click on it and let the magic begin. Grab what catches your eye, ask yourself will it go with my brand and am I helping someone with this printable? If the printable is for you then it needs to work for you!
Starting with Templates: Your Creative Springboard
One of the best features of Canva is its vast collection of templates.
- Time-Saving: Starting from scratch can be daunting and time-consuming. Templates give you a head start. Whether you’re creating a social media post, a flyer, an invitation, or a presentation, there’s a template for practically everything.
- Customizable for Your Unique Vision: Each template in Canva is fully customizable. This means you can take a design that kind of fits your vision and tweak it until it’s perfect. Change the text, swap out images, adjust the color palette, or add new elements. The possibilities are endless.
- Inspiration Galore: Sometimes, you might not know where to start. Browsing through templates can spark that creative light bulb. You might find a layout that resonates with your project or a color scheme that perfectly aligns with your brand.

4. Customizing Your Printable
Unleash Your Creativity
Canva is a playground for your imagination. Using templates will save you time so grab one that will work or kind of work because you can customize it for your needs.
Tips for Customizing Canva Templates
- Mix and Match Elements: Don’t feel restricted by the template’s original design. Mix elements from different templates to create something unique.
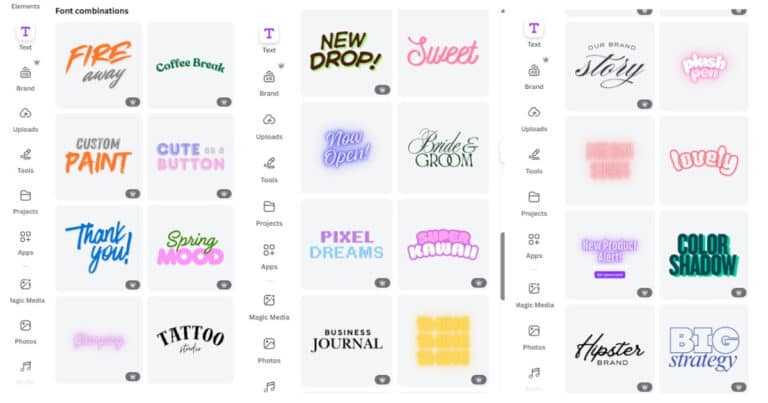
- Play with Typography: Canva offers a wide range of fonts. Experiment with different typography to convey the right mood and style for your design.
- Utilize the Canva Library: Apart from your own images, Canva’s library is filled with millions of photos, graphics, and icons. Use them to add more depth and personality to your designs.
- Experiment with Colors: Colors can dramatically alter the look and feel of your design. Use Canva’s color wheel tool to find perfect color combinations.
- Get Feedback: Sometimes, a fresh pair of eyes can provide valuable insights. Share your design with friends or colleagues to get feedback.
I started with this Template:

I made a couple of adjustments- changed the colors, fonts, and took out the name, and put a sticker up on it! Here is the template for this printable.

Here are some ways to customize your design:
- Add Text: Play around with different fonts, sizes, and colors. Remember, typography can set the mood for your printable.
- Insert Images: Upload your photos or choose from Canva’s extensive library. The drag-and-drop feature makes it super easy.
- Adjust Elements: Enhance your design with shapes, icons, or frames—experiment with resizing and recoloring to get it just right.
- Backgrounds: A great background can transform your design. Explore Canva’s collection to add that extra flair.
If you need more guidance on customizing your printable then join my Facebook Group – Canva Creations with Pam. I give weekly tips and tricks plus a bunch of FREEBIES.
5. Review and Refine
Think of your design like a delicious meal you've just prepared. Just as you'd taste it before serving, reviewing your design ensures it's ready to ‘serve' to your audience. This step is crucial for several reasons:
- Catching Errors: Typos, grammatical mistakes, or alignment issues can detract from the professionalism of your design. A thorough review helps catch these before they reach your audience.
- Consistency Checks: It's essential to ensure that your design maintains consistency in terms of fonts, color schemes, and imagery. Consistency strengthens your brand identity and makes your design more coherent and impactful.
- Aesthetic Appeal: Sometimes, stepping back and looking at your design as a whole can help you judge its overall aesthetic appeal. You might find that adjusting an element or two could enhance the overall look.
How to Review and Refine Your Printable in Canva
- Take a Break: After spending hours on a design, it's helpful to step away for a bit. When you come back, you'll have fresh eyes to spot potential issues.
- Zoom In and Out: Zoom in to check the finer details like text alignment and image quality. Zooming out helps you get a sense of the overall layout and balance.
- Check Text Elements: Look for typos, ensure your text is easy to read, and check that the font sizes are consistent throughout the design.
- Evaluate Visual Elements: Make sure images and graphics are of high quality and that they're aligned and sized appropriately. Also, check that they're relevant to your message.
- Assess the Color Scheme: Ensure that the colors used complement each other and align with the mood or message of your design.
- Get a Second Opinion: Sometimes, we're too close to our work to be objective. Ask a friend, colleague, or fellow designer to review your work. They might spot something you missed or offer a fresh perspective.
- Print a Test Copy: If it's a printable design, print a test copy. Things can look different on paper than they do on screen, so this step is crucial.
6. Download and Bringing Your Printable to Life
Finalizing Your Masterpiece
You've brainstormed, designed, tweaked, and reviewed. Now comes the moment of truth – bringing your digital creation into the real world. This step is as thrilling as it is crucial, marking the transition from concept to concrete.
Choosing the Right Format

When you click ‘Download' in Canva, you're greeted with a selection of format options. Here’s where you pick the best suit for your design’s purpose:
- PDF: Ideal for printables. It preserves the layout and quality, ensuring that what you see on screen is what you get in print. Especially useful for flyers, posters, or detailed reports.
- PNG: Great for designs with transparent backgrounds or for digital use where you need high-quality graphics.
- JPEG: A go-to for images destined for the web, particularly if you’re mindful of file size.
- MP4 or GIF: For animated designs, choose these formats to bring motion graphics to life.
File Quality and Size
- Quality Settings: Canva allows you to adjust the quality of your download. Higher quality is preferred for print, while lower quality might suffice for web use.
- File Size Considerations: Keep in mind the balance between quality and file size. Higher quality means larger files, which can be an important consideration depending on your end use.
Saving and Organizing Your Files
- File Naming: Give your file a descriptive name so you can easily find it later. Organizing your files right from the start can save you time and confusion down the line.
- Storage Solutions: Save your file in a designated folder on your computer or cloud storage for easy access and backup. You never know when you’ll need to revisit or revise a design.
Sharing Your Creation
- Direct Sharing: Canva also offers options to share your design directly from the platform to social media, email, or other platforms.
- Collaborate and Showcase: Share your design with friends, colleagues, or your audience. It's always exciting to showcase your work and receive feedback.

7. Print-The Final Step
You've designed, refined, and downloaded your creation. Now, it's time to transform it from pixels on a screen to ink on paper. This step is where you get to see and feel the fruits of your creative labor.
The Test Print
- Why Test Print?: Before you commit to printing multiple copies, a test print is essential. It's your chance to catch any discrepancies that might not have been visible on-screen.
- Check the Details: Pay attention to colors, clarity, and overall layout. What looked good on your monitor might appear different in print, especially in terms of color accuracy.
- Paper Quality Matters: The type of paper you use can vastly impact the final look. Whether it's glossy for vibrant photo prints or matte for elegant flyers, choose according to the purpose of your printout.
Adjusting Print Settings for Optimal Results
- Printer Settings: Dive into your printer settings. Here, you can adjust the print quality, select the correct paper type, and ensure that the print size matches your design.
- Alignment and Margins: Ensure that your design is aligned correctly and that margins are set as intended. Sometimes designs can be cut off if not aligned properly with the printer's capabilities.
- Ink Levels: Check your printer's ink levels to avoid any unexpected color changes or streaks.
Tweaking Your Design if Needed
- Back to Canva for Adjustments: If your test print reveals areas for improvement, don’t hesitate to go back to Canva for adjustments. It could be something as simple as tweaking a color, resizing some elements, or correcting the text placement.
- Iterative Process: Remember, achieving perfection might take a few tries. Each test print is an opportunity to make your design even better.
HERE IS A COPY OF A VERY SIMPLE CHECKLIST- GRAB TEMPLATE HERE.
8. The Satisfaction of a Job Well Done
Once you’re happy with the test print, go ahead with the final printing. Seeing your design in its final, physical form is incredibly satisfying. Take a moment to appreciate your work. You’ve successfully navigated the journey from an idea in your head to a printable. This is a big success because the majority of people give up at the IDEA stage.
Beyond the Basics
- Variety is the Spice of Design: Canva's library is full of images, icons, and fonts. Each element is a building block for your unique design.
- User-Friendly for All: Canva’s intuitive drag-and-drop interface and pre-designed templates mean you don’t need a degree in design to create something stunning.
- Flexibility in Formats: Download your designs in various formats or share them directly on social media or your website.
Canva is your go-to tool for creating printables that are not only professional but also infused with your personal touch. It's simple, versatile, and perfect for all your printable design needs. So why wait? Embrace the ease, enjoy the versatility, and express your creativity. Canva is not just a tool; it's your creative partner, waiting to help you transform your ideas into beautiful realities. You can use your printables in blog posts to get people to sign up for your email list.
Leave a comment on what PRINTABLE you are going to create.
Take Your Canva Experience to the Next Level

If you're already excited about your design journey with Canva, then you'll be thrilled to discover The Clubhouse.
Inside The Clubhouse, you will discover:
- Unique Design Inspirations
- Monthly How-To Video Tutorials
- Three Valuable Monthly Zoom Calls- Tips & Tricks/Special Guest/How To Masterclass
- Monthly 180 Digital and Blog ideas plus new feature- PRODUCT PROMPTS
- Exclusive Platform and FB Community
The Clubhouse is all about uniqueness, creativity, and having fun while leveraging Canva to maximize one's digital product potential.
Or if you NEED more, I also have a membership that gives you NEXT LEVEL CANVA tips, templates, ideas, products, and community! Check out THE CLUBHOUSE